
This is the Chronos User Guide. If you're new to Chronos, we recommend working through the Chronos Tutorial and reading the announcement blog post for an introductory.
You may also may be interested in the keyboard shortcuts cheatsheet and the Chronos FAQ.
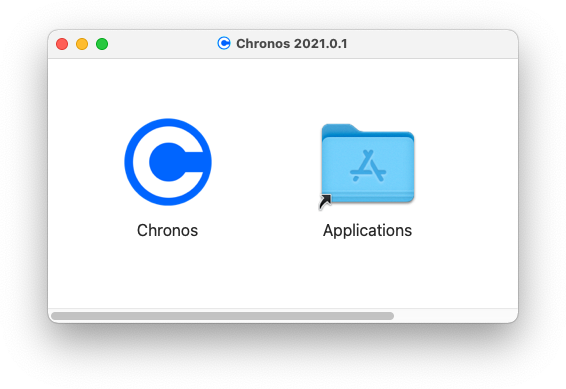
Download the latest version of Chronos from the downloads page.
Double-click the downloaded DMG package and drag the
Chronos icon to the Applications folder:
Software updates are free for one year after purchase of a Chronos license.
Help > Software Updates... will open our
downloads page from the menu bar. This page
will host the latest version of Chronos.
New versions of Chronos are announced on our Twitter account, and you can also be notified by email when new versions are released.
A future version of Chronos will optionally check for updates automatically.
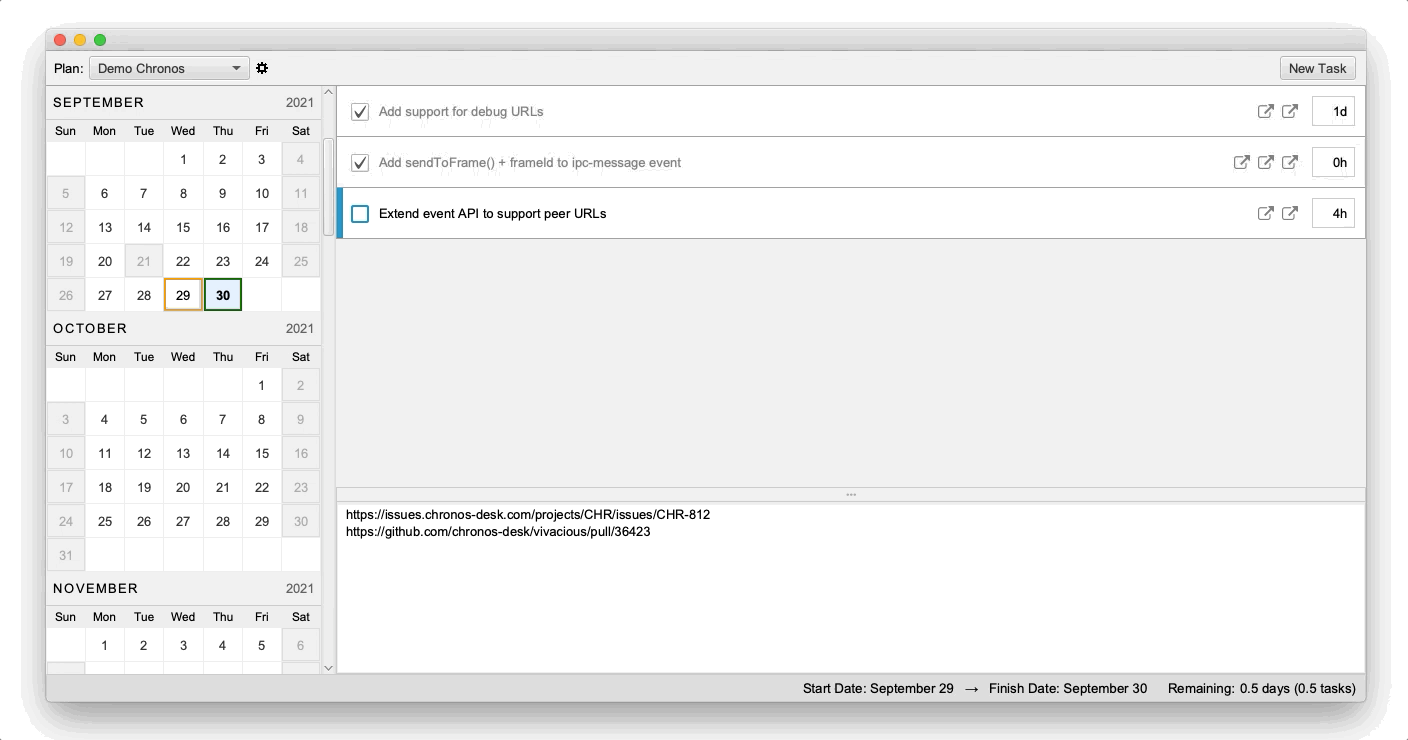
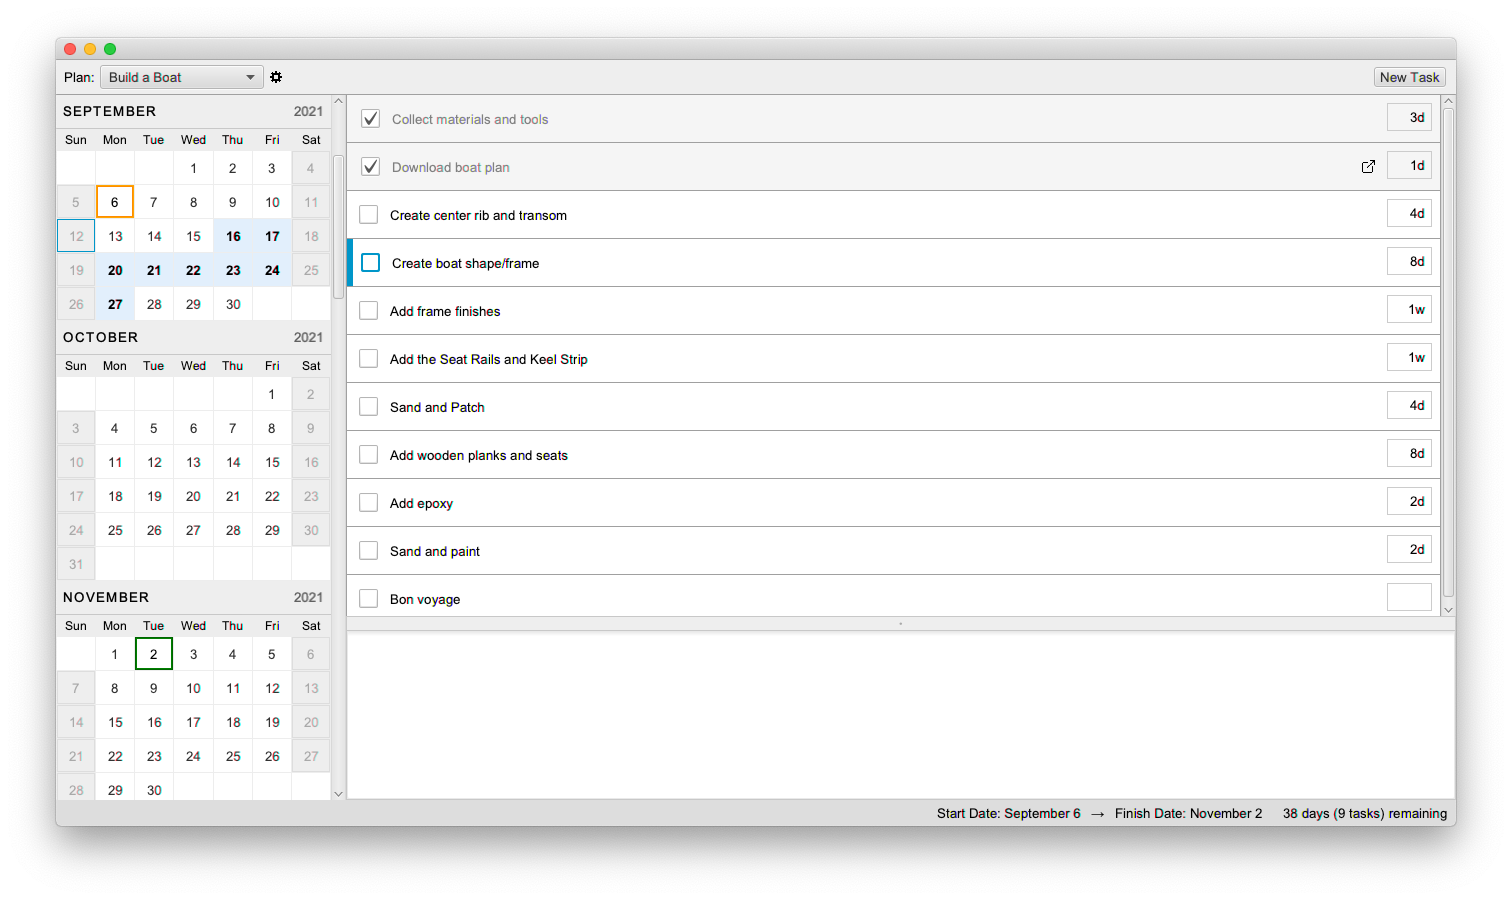
The Chronos UI is composed of a side-panel calendar, a task list, and a notes pane.
Each task has a field for estimation and the notes area is always scoped to the currently focused task:
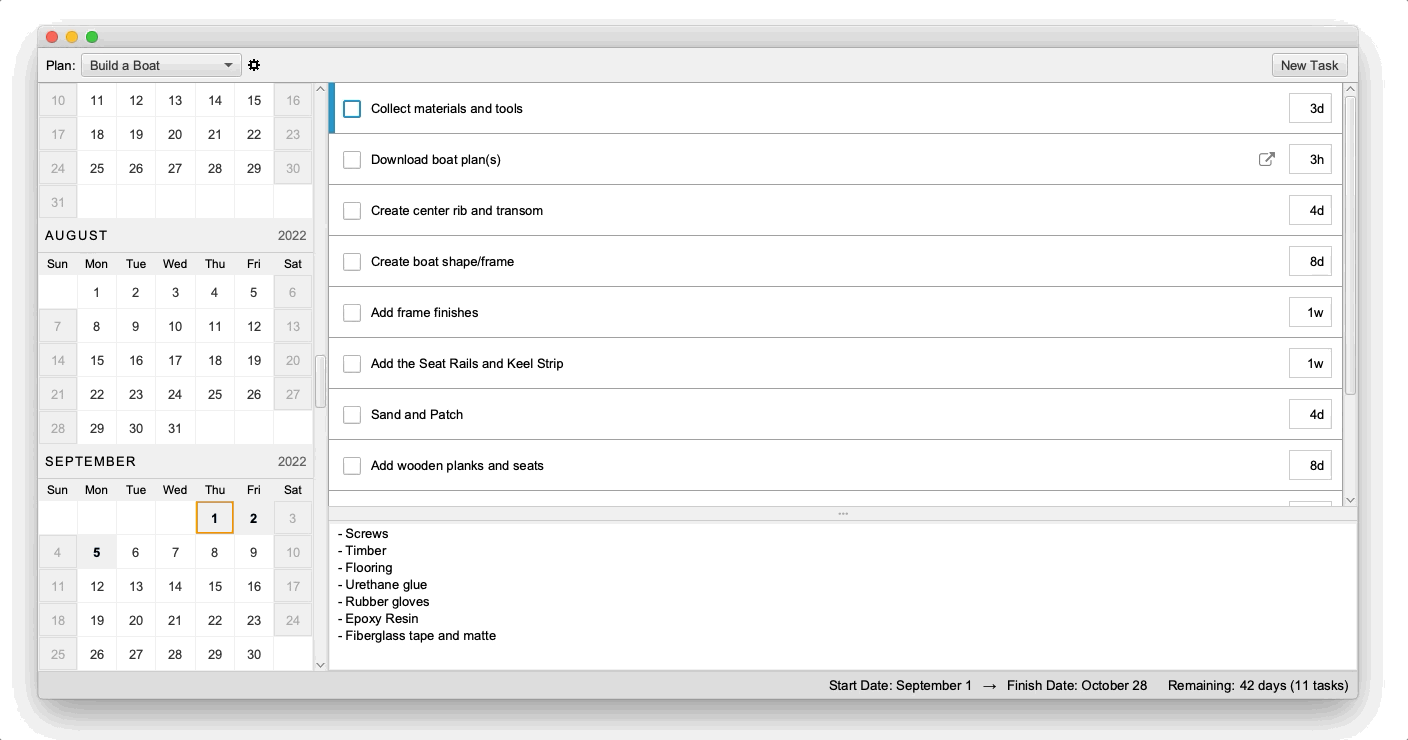
If a task has an estimate, the calendar will highlight the projected on-task days for the currently focused task.
The status bar at the bottom provides a summary of the current plan, such as the number of tasks and amount of time remaining in the plan, including a projection of the plan's completion date.
The Chronos UI is mouse-friendly, but is designed fully around keyboard shortcuts. A cheatsheet of all shortcuts can be found here.
Tasks are created within a plan. When you first install Chronos you will start with an initial plan, with a default plan configuration.
Plans have configuration settings, which can be opened from the
by pressing Command+P, or via File > Edit > Edit Plan....
Plans can be created by selecting File > New > New Plan...
from the menu bar (or via Shift+Command+P).
Press Command+T to create a new task below the current
task.
When you create a new task it immediately enters editing mode:
Alternatively you can click the Add Task button
to create a task.
The currently focused task is indicated by a blue marker to the left of the task:

The focused task can be
changed by pressing j (down) or k (up).
The arrow keys (↓/↑) and Tab and Shift+Tab
will also work to move the task focus.
Shift+k moves a task up. Shift+j moves a task down:
Helpful tip: Shift+Up and Shift+Down will also move a task up and
down, respectively.
Tip: You can also reorder by right-clicking the task and selecting
Move Up or Move Down from the pop-up menu.
To delete a task, make sure it is focused and press the Delete
key.
Command+Z can be used to undo a task delete or create operation;
Command+Shift+Z to redo.
To edit a task, its estimate, or notes, you must enter editing mode.
This is achieved by pressing Enter
while the task is focused, or by double-clicking the task.
In editing mode, the task, its estimate, and the notes panel are kept in view while the rest of the UI is grayed out:
In the above screen capture, the user is editing the task name and
then using Tab to cycle focus through the estimate field
to the notes editor.
Esc, Enter, or Command+S will save
all changes and exit editing mode.
Note: Ctrl+Enter (in addition to Esc
and Command+S) can be used to save and exit editing mode
from within the notes editor.
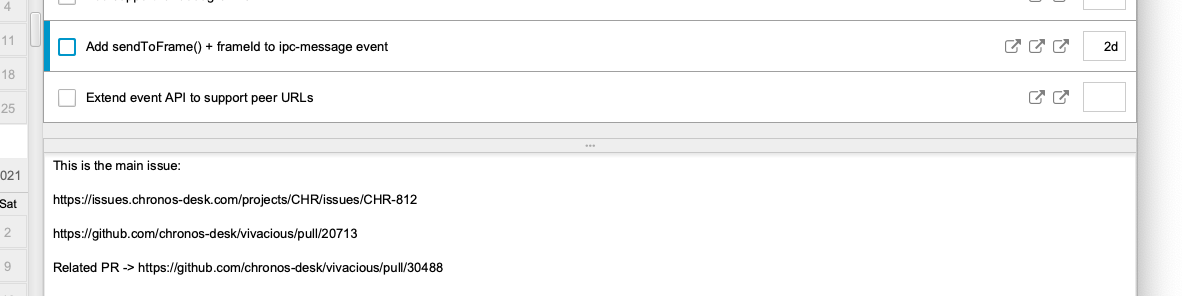
The notes area provides a place to add notes and links related to each task.
Links are automatically detected in the notes
of a task and a clickable
 is added in the task row for each detected link.
It is common to add links from individual tasks to related work in other systems — for example, tickets in Jira and/or other ticket tracking systems, URLs to Github / VCS pull requests or gists, branches or commit hashes, etc.
Tip: The notes area can be enlarged by clicking in the center of the spacer bar, just above the notes pane.
Tip: Double-clicking the notes area will enter editing mode while giving editing focus to the task notes. You can always select and copy text from the notes area.
Tip (advanced): While a task is focused, Esc can be used to
enter editing mode and jump focus directly to the notes pane. This is
a faster alternative to Enter/Tab/Tab,
or Enter/Shift+Tab.
URLs (including file:// URLs) are detected in task notes and links are generated
within the task:
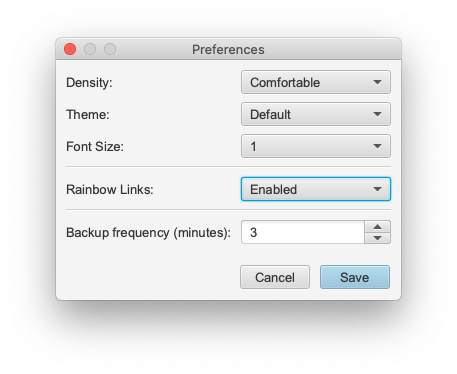
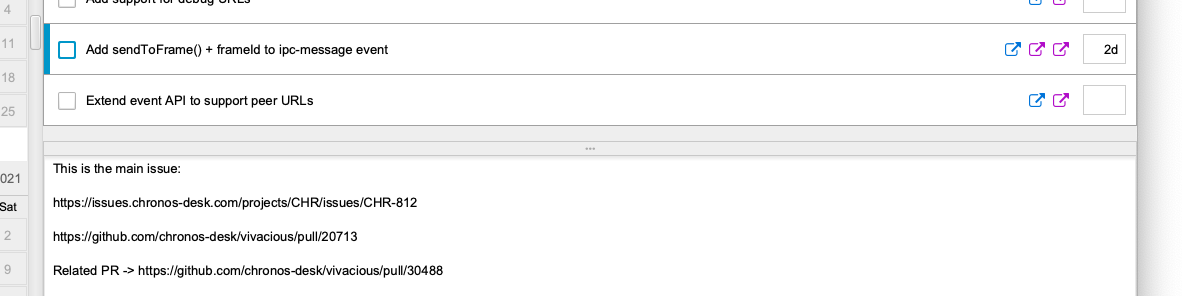
"Rainbow Links" can be enabled from Chronos Preferences.
 This will color links with different domains for easy distinction:
Estimates are entered in (h)our, (d)ay, and (w)eek-long units. Estimate values can be whole or decimal form (with one decimal place supported).
To add an estimate for a task, enter editing mode and press Tab
once to jump to the estimation field.
Examples of valid estimates:
4h
0.5d
8d
2w
2.5w
Estimations can be changed or cleared at any time.
Unestimated tasks contribute no value to the overall plan estimate.
To the left of each task is a checkbox indicating its completion status. This checkbox is not directly manipulable.
A task is marked completed whenever it's due date is before the current day (today). A task's due date is determined by its estimate, the estimates of tasks that precede it, and the explicit start date of the plan.
To ensure that tasks are checked off only when they are complete, we simply follow the simple rule of Chronos:
If a task is checked off but not yet complete, we simply increase the estimate enough (or reposition the task to extend its computed due date) — until it is no longer checked.
If a task is complete but not yet checked off, we simply reduce the estimate (or reposition the task accordingly.)
Completed tasks are checked off when their completion time is before the current day. If a task is projected to be complete by the end of the current day and you are finished with the task, there is no need to update the task's estimate.
In later versions of Chronos, tasks due today are identifiable
an indeterminate checkbox
( ).
).
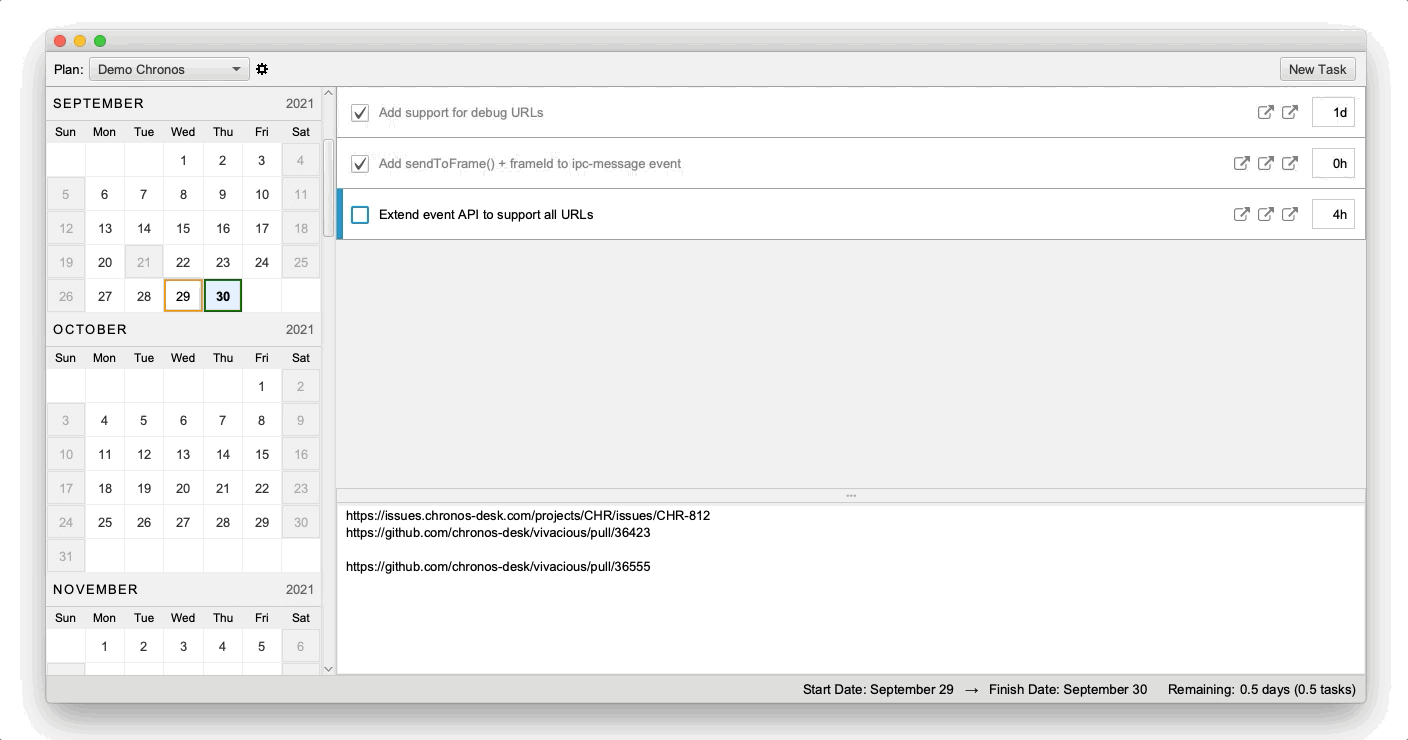
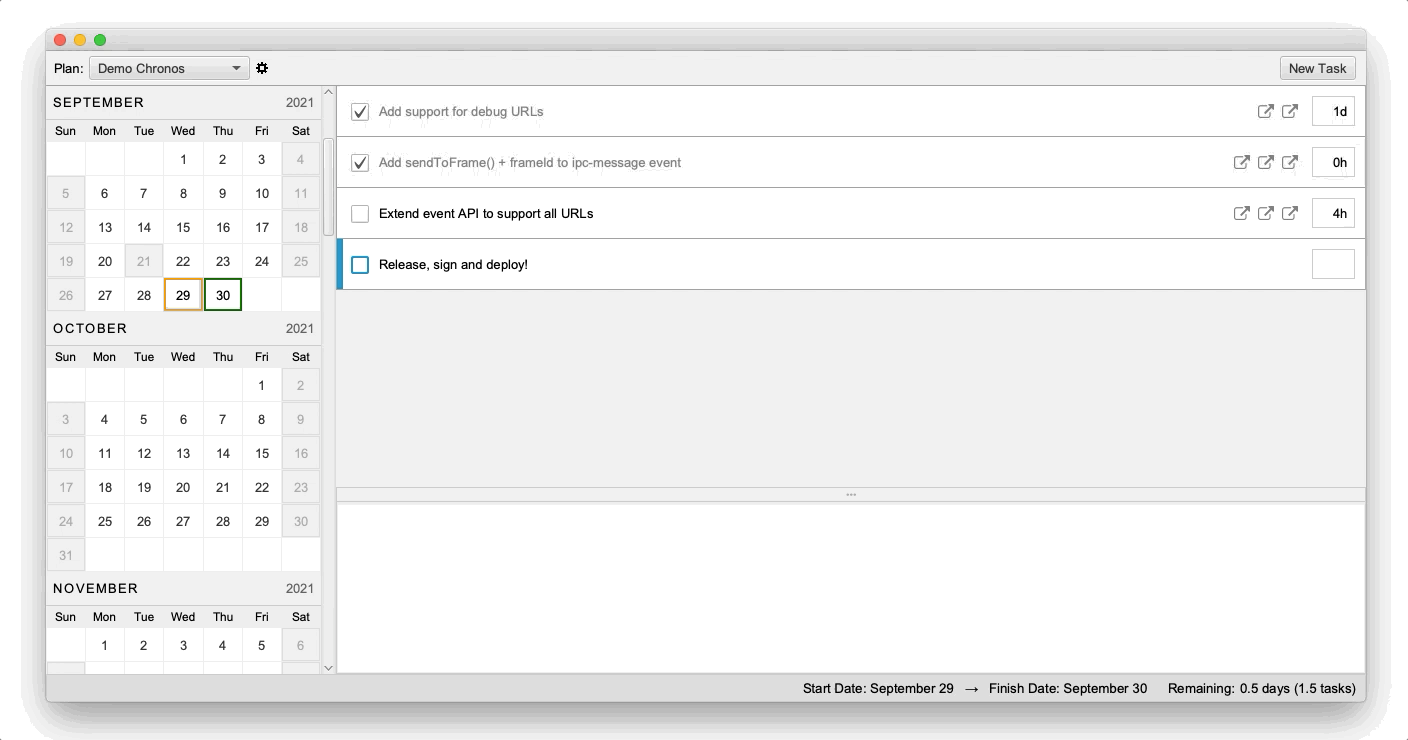
For example, suppose I've just finished the following four-hour task, which is projected to be completed today:

I do not need to do anything. Tomorrow the task will be marked as completed:

This process of using estimates to check off tasks may seem counterintuitive at first, but it underlies the power of Chronos's fundamental model: by following a simple process you'll always maintain a fully accurate historical record of your own personal time, and you'll use the same language of estimates when predicting the outcome of future tasks.
In some cases, we may wish to simply "check off" a task regardless of where it exists in the task order.
Instead of recording the actual time you spent on a task, you can
mark any task as complete by giving it an explicit 0
(zero) estimate.
This is the cheat for manually "checking off" tasks in Chronos without having
to estimate or set a start date. Any task given a 0 estimate
will be marked as complete and removed the time flow of the plan.
Hit / to popup a search box, type your search string,
and hit Enter.
Results will be highlighted in yellow, and the first result (if any) will be given the task focus.
If there are results in other plans, you'll see a note in the top bar.
To see results in other plans, you can switch plans quickly
with a keystroke (Ctrl+Tab and
Ctrl+Shift+Tab).
The Chronos calendar places your plan and tasks in the context
of real-world calendar days:
 In this screenshot, we see our project's start date in orange,
the project's computed finish date in green,
and the focused task's calculated on-task days highlighted in
light blue.
In this screenshot, we see our project's start date in orange,
the project's computed finish date in green,
and the focused task's calculated on-task days highlighted in
light blue.
The calendar is kept in sync as you refactor your plan, its tasks, estimates and plan configuration properties.
Whenever you change the focused task, you'll see the calendar days highlighted for that task. In this way you can see exactly what you'll be working on for any given day of the plan, and make prioritization and scope decisions based on this data in real-time.
Every Chronos plan has an optional start date. Initially this value is unset. As you create and estimate tasks, the status bar displays a predicted completion date as if the plan were started today.

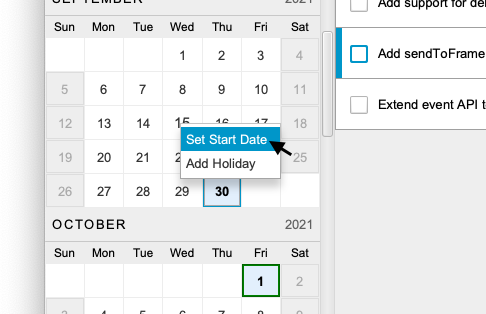
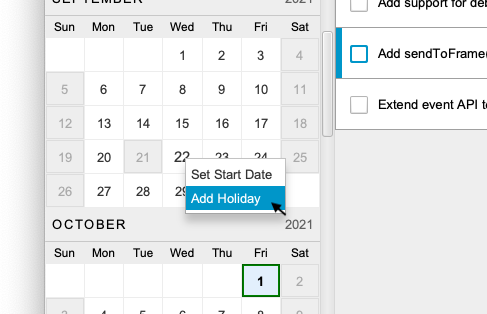
At any time the plan's start date can be set by right-clicking
the date in the calendar and clicking Set Start Date.
(This value can be cleared or updated at any time.)
Tip: The start date can also be updated, along with other configuration, on the plan settings page. This can be an easier alternatively if your start date is far in the past or future.
When the plan has a start date, the status bar will show the full projected on-task dates of the plan:

The plan settings can be accessed by clicking the gear icon next the plan
selector in the top bar. Alternatively, Command+P can be used
to open the plan editor:
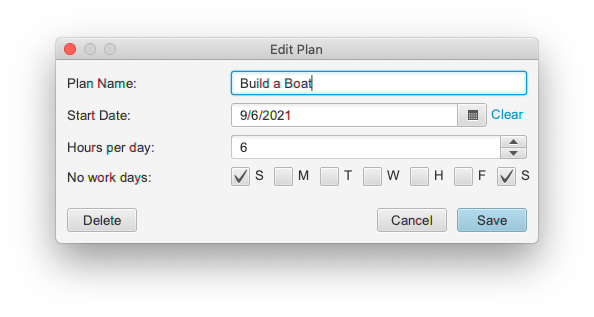 Other plan settings allow you to specify how many "on-task" hours to
assume per day and which days to consider regular "non-work" days.
Other plan settings allow you to specify how many "on-task" hours to
assume per day and which days to consider regular "non-work" days.
"Non-work" days are defaulted to traditional Saturday / Sunday weekend days, but are often edited for consulting-oriented and other non-traditional work schedules.
Note: Explicit holidays/sick days/meeting days can be added or removed by
right-clicking days in the calendar and clicking
Add Holiday. This feature allows for pitch-perfect
calendar-based plan tracking:
By default your entire Chronos workspace (all plans and tasks) are backed-up
every minute. Backups are retained for the past 10 days in
~/.chronos/backups.
You can explicitly export your plan at anytime by selecting
File > Export... from the menu bar.
File > Import... is used to reimport exported data.
Presently all plans are exported/imported, but unwanted plans
can be deleted individually from the UI.
(The export file format is a presently JSON, but future releases of Chronos will support more Export (and Import) options and formats, including visual formats such as HTML and Markdown.)

